关机并拔掉电源线。等风扇停止后,再打开机箱。Shut down and unplug. Wait for the fans to stop before opening the case.
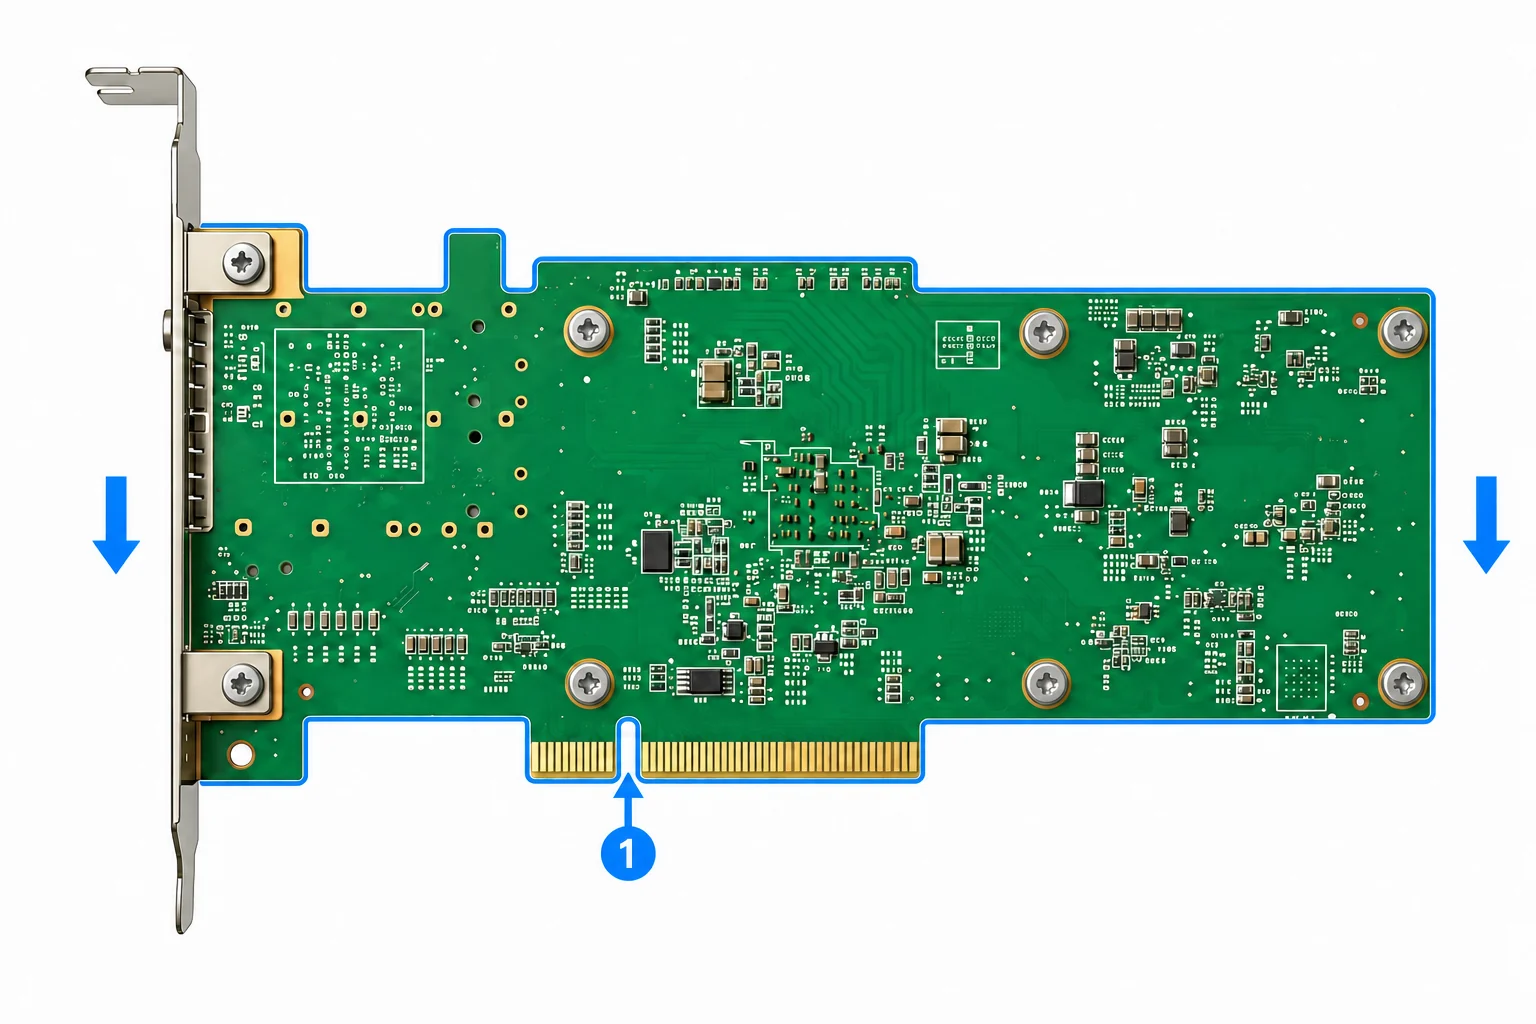
按主板说明书选好 PCIe 插槽和挡板。对齐缺口,握住板卡边缘均匀插入,拧紧挡板螺丝。Use the motherboard manual to choose the PCIe slot and bracket. Align the notch, press evenly on the board edges and secure the bracket screw.
完成标准 板卡插到底、挡板已固定。Ready when The board is fully seated and the bracket is secure.
插不进就停下检查,不要摇晃硬压或按板上元件。If it does not fit, stop and check. Do not force it, rock it or press on components.
点击放大 ↗Enlarge ↗对齐金手指缺口,均匀插入Align the connector notch and press evenly
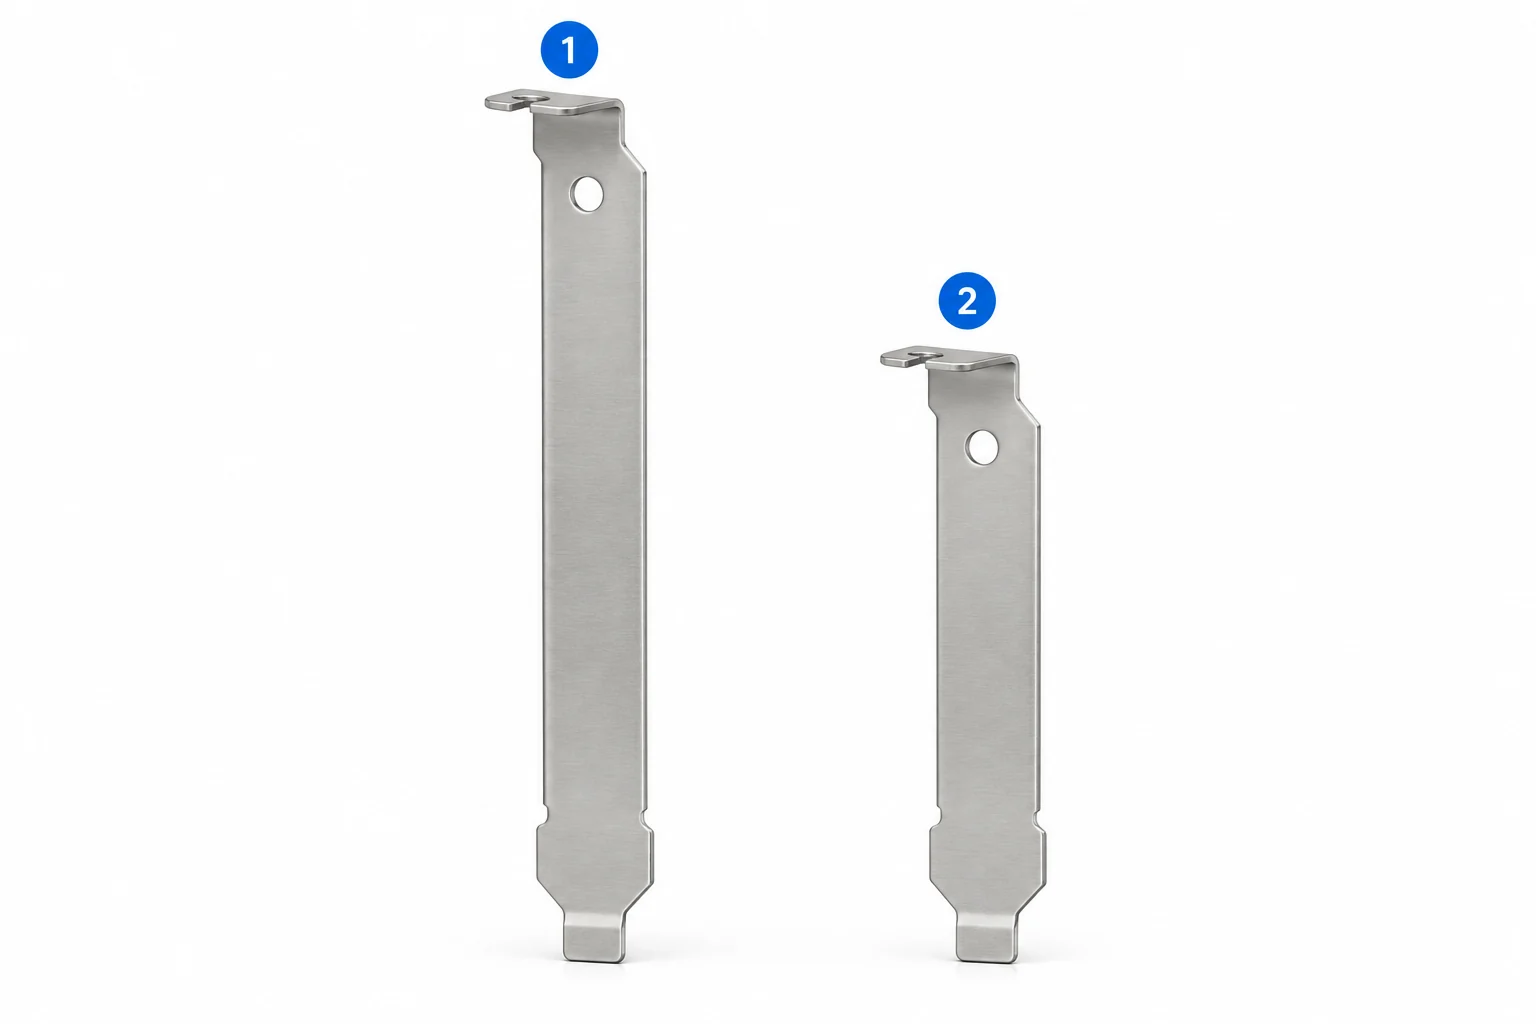
挡板怎么选?Which bracket fits?
比对机箱开口高度和固定孔,同时确认板卡本体能放进机箱。换挡板只卸挡板螺丝,不拆散热器。Match the case opening and screw holes, and check that the board itself fits. When changing the bracket, remove only its screws; do not remove the heatsink.
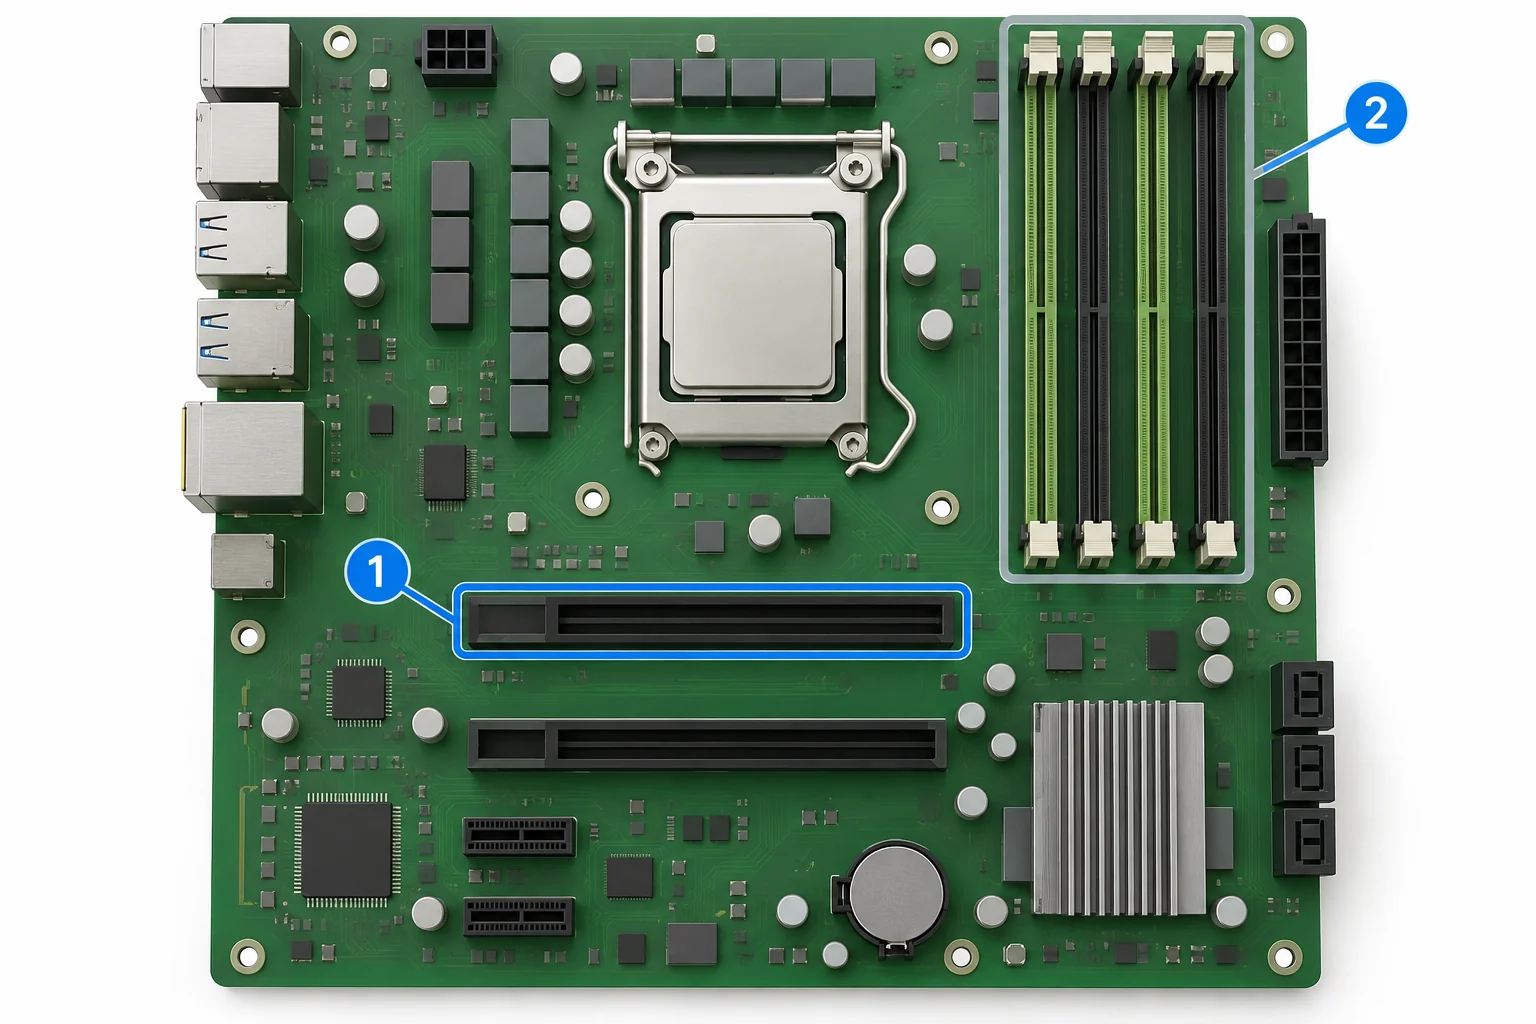
查主板说明书,核对插槽尺寸、实际通道数与共享限制。长插槽不等于通道多;有卡扣先按说明打开。规格不明或已被占用时,先联系支持,不要自行拆掉其他设备。Check the motherboard manual for slot size, actual lanes and sharing restrictions. A longer slot does not mean more lanes. If there is a latch, open it as instructed before inserting the board. If the slot is unclear or occupied, contact support before removing other hardware.
接光纤:照着这 4 个动作插Connect the fiber: four simple actions
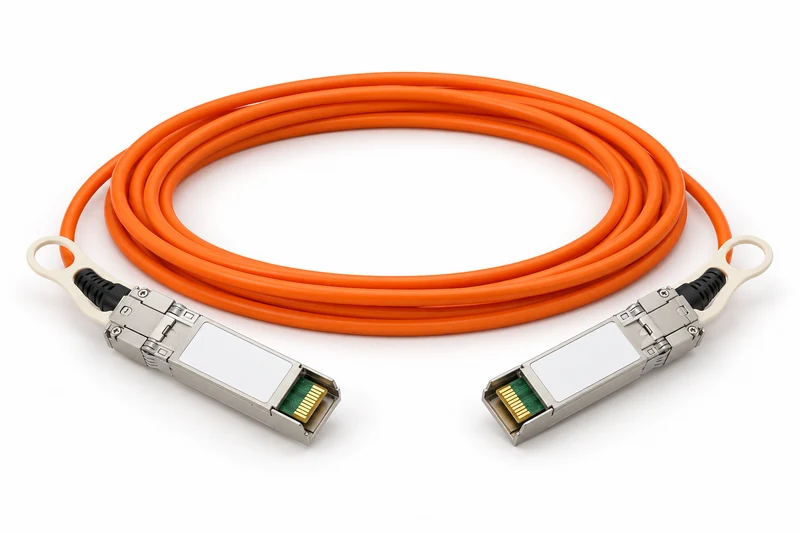
先接好一端,再用同样方法接另一端。全程握住金属插头,不要拽线缆。Connect one end, then repeat for the other. Hold the metal connector, not the cable.
1找对接口Find the correct port
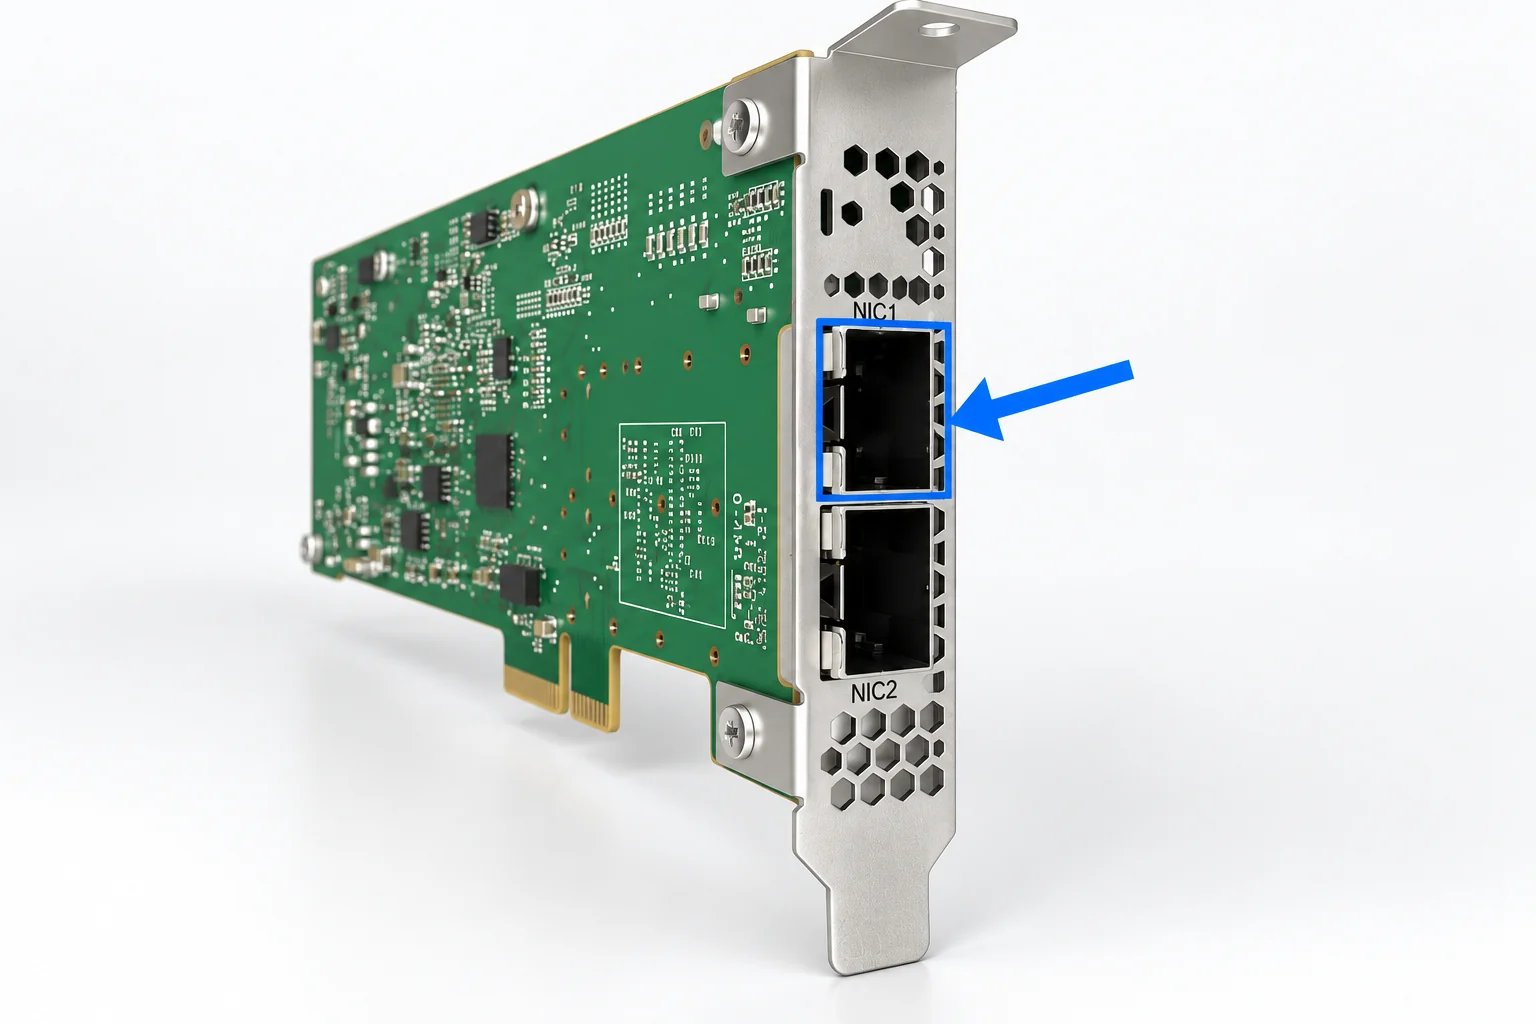
按套件标签找到两端指定的光纤接口。要求使用 NIC1 时,就找 NIC1 标签,不要只记“上面那个口”。Find the designated optical port at each end using the kit labels. Use NIC1 when the kit specifies it; do not rely on the port position.
接口或插头如有防尘塞 / 保护帽,先取下再插。Remove any port dust plug or connector protective cap before inserting.
点击放大 ↗Enlarge ↗蓝框是这张示意图的 NIC1;其他型号看实物标签。The blue box marks NIC1 on this example; check the labels on your own device.
2握外壳,触点端朝里Hold the housing; aim the contact end inward
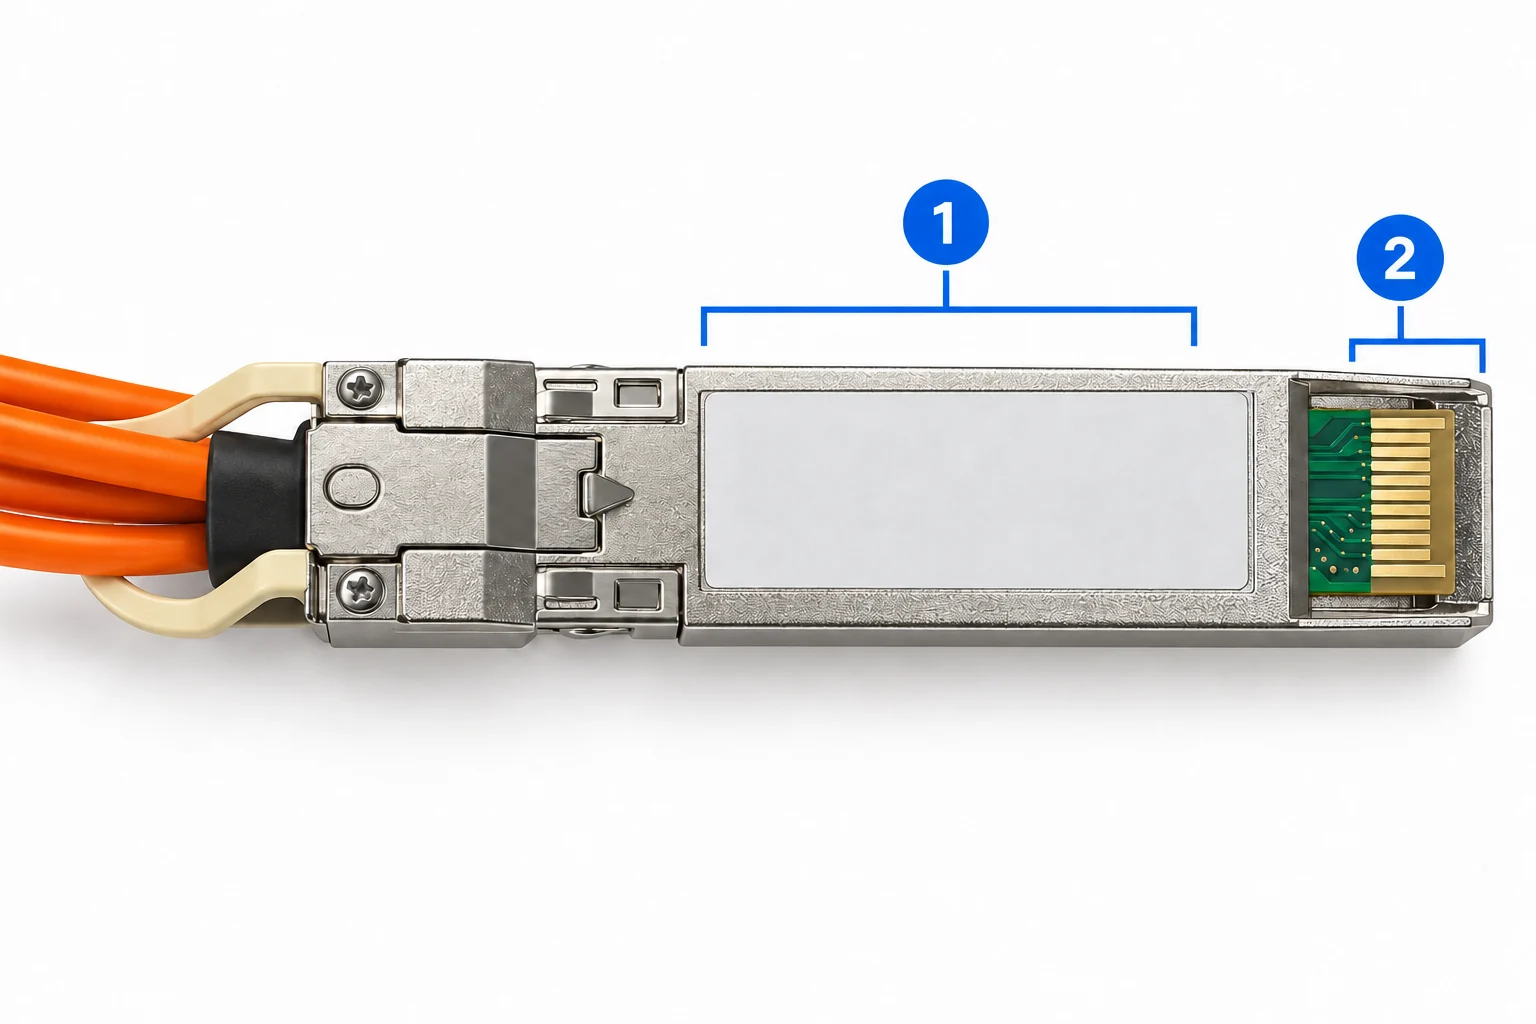
手指拿住图中 ① 金属外壳,让 ② 触点端朝向接口,线缆留在外侧。先对照插头与接口形状,确认方向。Hold ① the metal housing, with ② the contact end facing the port and the cable outside. Match the connector shape and orientation to the port first.
别拉着解锁拉环往里插,也别推着线身用力。不同设备的接口朝向可能相反。Do not pull the release tab while inserting or push on the cable. Port orientation may differ between devices.
点击放大 ↗Enlarge ↗① 握这里:金属外壳 ② 这一端先进入接口① Hold here: metal housing · ② Insert this contact end first
3对正,平直推到底Align and push straight until seated
把插头和接口放在同一条直线上,用手指推动金属外壳,平直、缓慢推入,直到插头就位、锁扣卡住。Keep the connector in line with the port. Push on the metal housing slowly and straight until the connector is seated and the latch engages.
刚插就卡住?停下并退出,重新核对方向和接口;不要斜插、左右撬动或硬顶。It catches or resists? Stop and withdraw it, then recheck the orientation and port. Do not tilt, lever it sideways or force it.
点击放大 ↗Enlarge ↗推进方向示意;实际朝向以插头和接口结构为准。Insertion direction only; match the actual connector and port orientation.
4轻拉外壳,确认锁住Gently check that it is latched
不拉解锁拉环,轻轻向外拉一下金属外壳。没有退出,说明锁扣已扣住;如果轻拉就滑出,重新对准、推到位后再检查。Do not pull the release tab. Gently pull back on the metal housing. It should stay latched. If it slides out, align it again, seat it fully and recheck.
不必一定听到“咔嗒”声。另一端也按上面的方法接好、检查。You do not need to hear a click. Connect and check the other end the same way.
完成标准 主机、副机两端都接对并锁紧,再进行第 3 步安装驱动。Ready when Both ends are in the correct ports and latched. Continue to step 3 to install the driver.
需要拔下时:先解锁,再拔出To unplug: release the latch first
找到插头上的拉环或锁扣,按该线材的结构先解锁,再沿接口方向平直抽出。不要直接拽光纤,也不要没解锁就硬拔。Locate the connector release tab or latch and release it as specified for the cable, then withdraw the connector straight. Do not pull on the fiber or force a locked connector out.
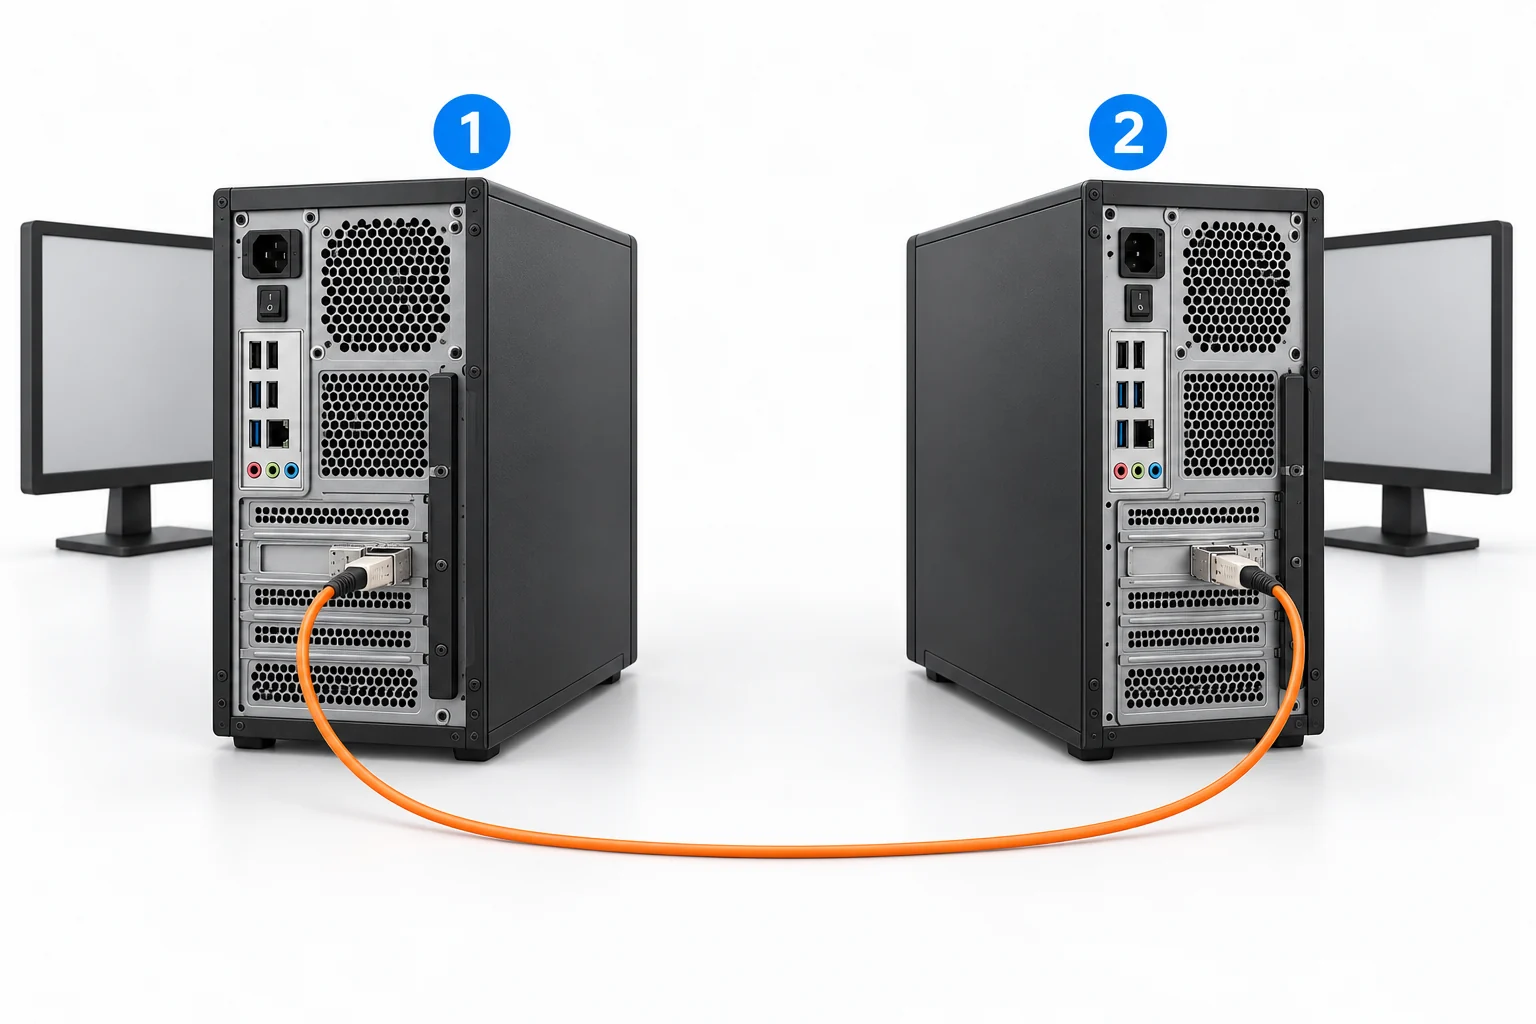
查看主机与副机整体接线图See the complete connection diagram
点击放大 ↗Enlarge ↗① 主机 ② 副机 · 配套光纤连接两端指定接口① Primary PC · ② Secondary PC · Connect the designated ports with the supplied cable
25G 是线缆额定规格,实际速度以设备状态和测速结果为准。25G is the cable rating; actual performance depends on the devices and speed-test results.
03
在副机操作ON THE SECONDARY PC
装副机驱动Install the secondary-PC driver
确认板卡固定、光纤锁紧,盖好机箱,再接电开机。Check the boards and cable, close the cases, then reconnect power and turn on.
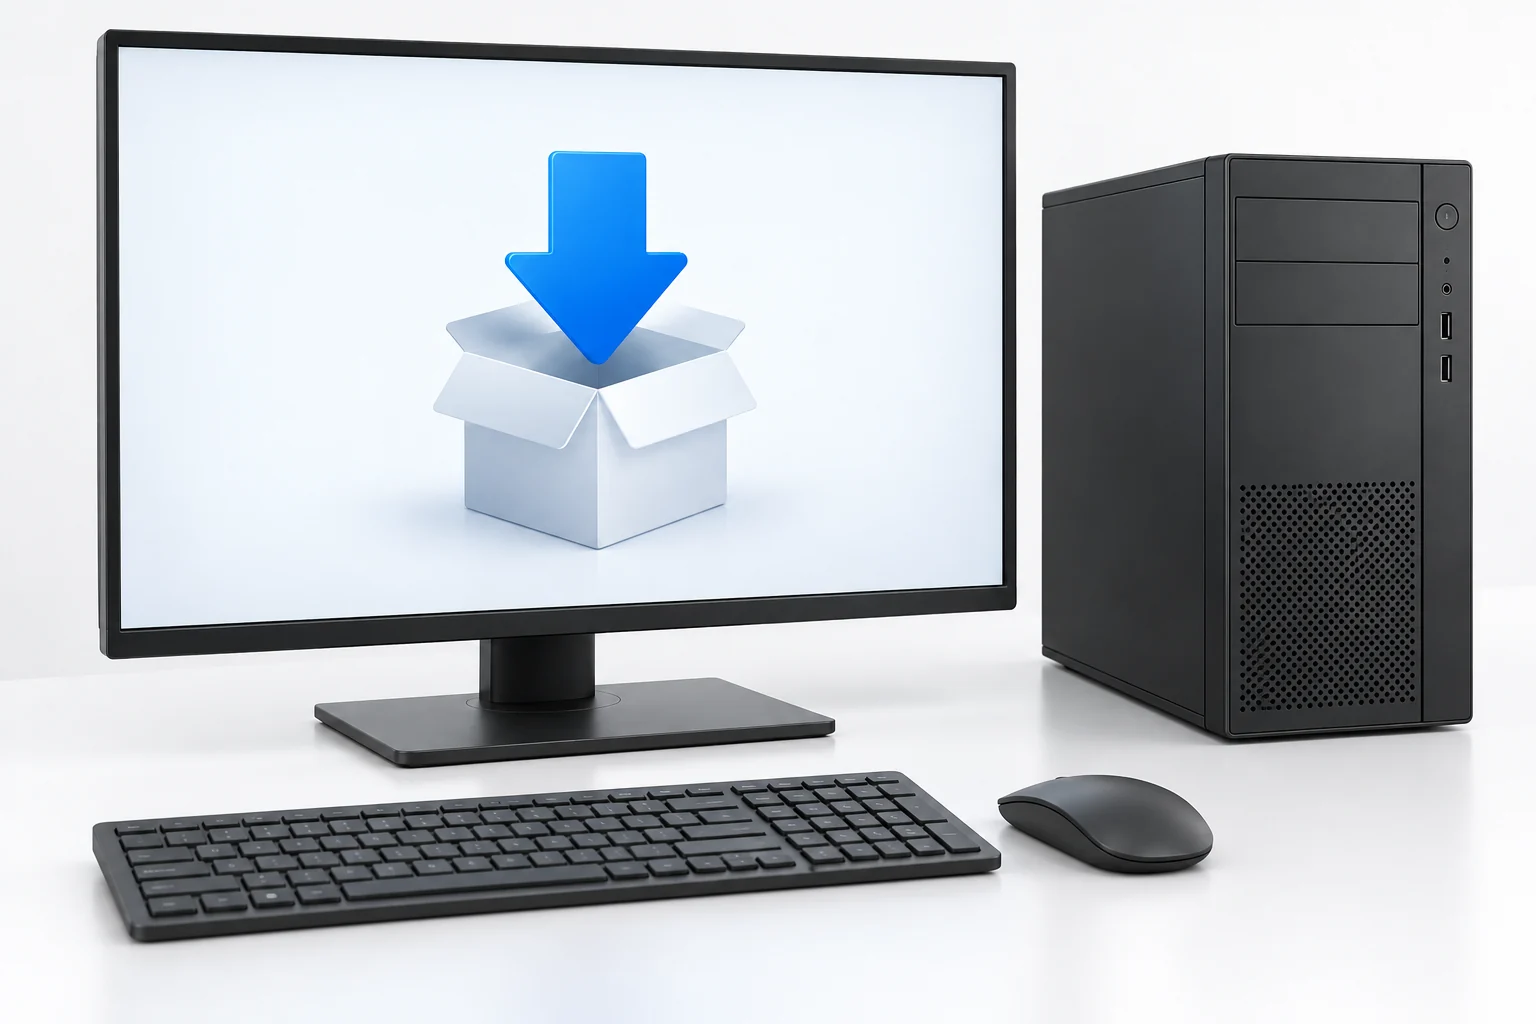
在副机下载官方驱动。右键安装包 → 以管理员身份运行,按提示安装。Download the official driver on the secondary PC. Right-click the installer → Run as administrator, then follow its instructions.
测速工具先解压,按包内说明运行,记录工具版本、设置和原始单位。异常时记下故障时间,按需采集日志。Extract the speed-test package and follow its instructions. Record the tool version, settings and original units. For problems, note the time and collect logs as needed.

 点击放大 ↗Enlarge ↗
 点击放大 ↗Enlarge ↗
 点击放大 ↗Enlarge ↗
 点击放大 ↗Enlarge ↗
 点击放大 ↗Enlarge ↗
 点击放大 ↗Enlarge ↗
 点击放大 ↗Enlarge ↗